The Well-Trimmed Toe: On Making a Shoe Rose
I used one inch wide pure silk hand dyed ribbon and silk thread for the shoe roses. I used one and a quarter yards of ribbon for each shoe rose, so three and a half yards total. My materials cost me six dollars for a pair of ribbons. Satin finish and grosgrain ribbons should be avoided as satin finish ribbons were not availible and grosgrain ribbons were not used for shoe roses in our period. Many colors were available, and people who could afford them often had several pairs as they were fashionable and easily replaced.
The shoe roses I made finished about three inches across, so each petal is about an inch and a half long in the base layer. I also made a template of the outline of the first to make sure the second would be approximately the same size.
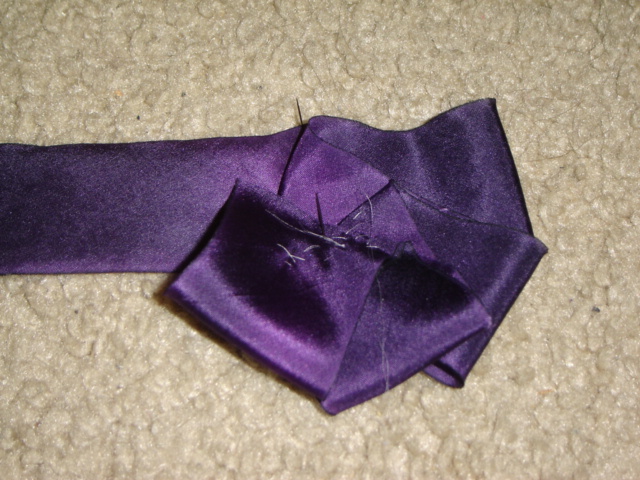
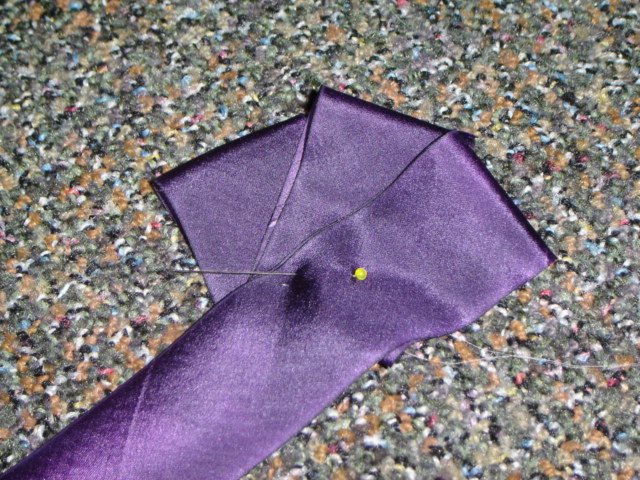 I began by pinning
the first three petals of the first layer together. The petals
should overlap slightly so that there are no gaps, but only
slightly. Any kind of ribbon will be extremely slippery, so don't
be frustrated if you need to pin the first two petals together and then
pin the third to them later. The photo show at left is of the
intended top of the shoe rose.
I began by pinning
the first three petals of the first layer together. The petals
should overlap slightly so that there are no gaps, but only
slightly. Any kind of ribbon will be extremely slippery, so don't
be frustrated if you need to pin the first two petals together and then
pin the third to them later. The photo show at left is of the
intended top of the shoe rose.
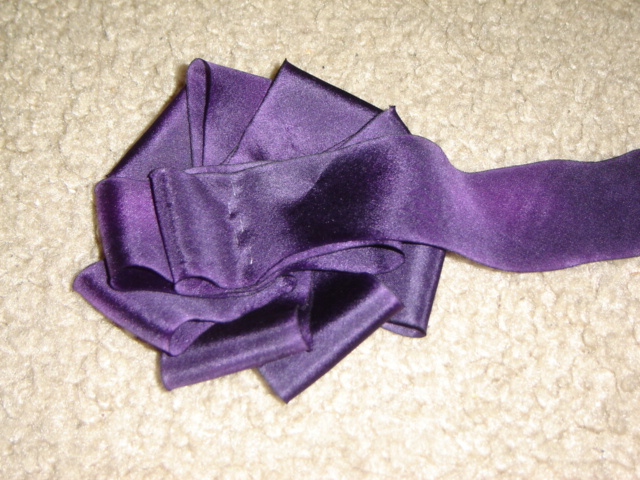
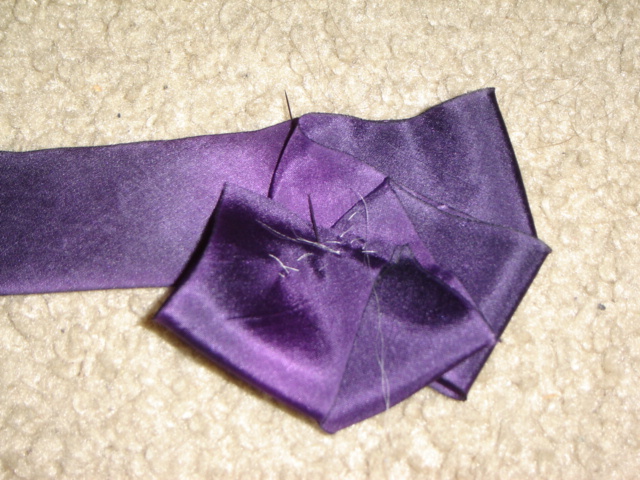 I then sewed the
three layers together with my silk thread. I chose silk thread
because of the delicacy of the ribbon, but I think a fine sewing thread
could be used as well. I tried to make sure that all three of the
layers were sewn together at some points. The photo show at left
is of the back of the shoe rose. I found it helpful when sewing
to take the last stich before moving on so that the needle and thread
went from the top to the back of the shoe rose, as each new petal will
be layered on the top and the thread gets in the way if it is left on
top.
I then sewed the
three layers together with my silk thread. I chose silk thread
because of the delicacy of the ribbon, but I think a fine sewing thread
could be used as well. I tried to make sure that all three of the
layers were sewn together at some points. The photo show at left
is of the back of the shoe rose. I found it helpful when sewing
to take the last stich before moving on so that the needle and thread
went from the top to the back of the shoe rose, as each new petal will
be layered on the top and the thread gets in the way if it is left on
top.
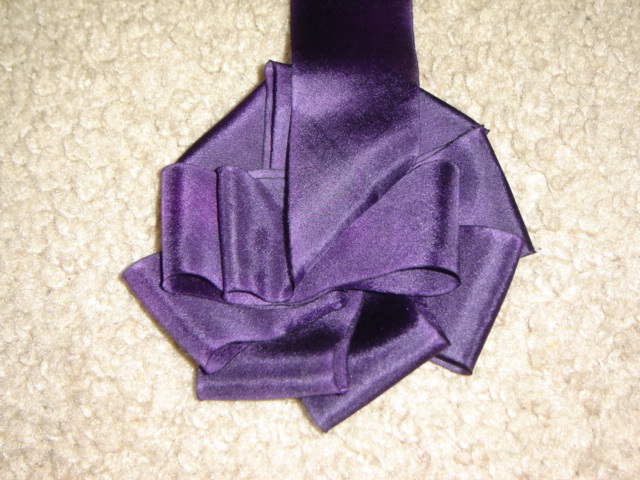
 This is again taken
from the back of the shoe rose. After the first three petals were
done, I sewed each following petal on seperately, always ending with
the thread to the back of the shoe rose.
This is again taken
from the back of the shoe rose. After the first three petals were
done, I sewed each following petal on seperately, always ending with
the thread to the back of the shoe rose.
 When a complete
circle was made with nine petals, I sewed down the last petal, laid the
ribon down straight across from the last petal, folded it just short of
the previous layer of petals, and folded it back on itself to created a
sort of bar across the bottom layer of petals. I then sewed a straight
line about a half inch away from the last fold.
When a complete
circle was made with nine petals, I sewed down the last petal, laid the
ribon down straight across from the last petal, folded it just short of
the previous layer of petals, and folded it back on itself to created a
sort of bar across the bottom layer of petals. I then sewed a straight
line about a half inch away from the last fold.
 To create the cross
bar, I folded the ribbon in a forty-five degree angle to the previously
made bar repeated the previous step, folding it back on itself to
create a center cross and then sewed the middle down.
To create the cross
bar, I folded the ribbon in a forty-five degree angle to the previously
made bar repeated the previous step, folding it back on itself to
create a center cross and then sewed the middle down.
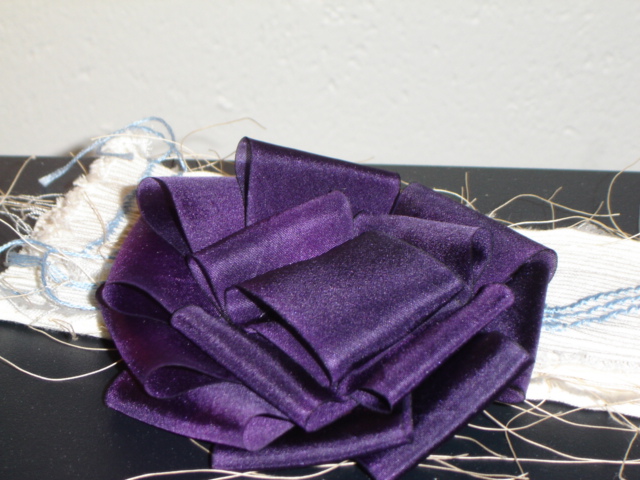 To create the middle
cap petal that hides the rest of the stiches and folding, I looped the
tail end of the ribbon over on itself again, stopping just short of the
previous layer of petals. To cover all the stitches, it helps to
sew a line farther out than all the previous stitches before flipping
the ribbon over. The very end of the ribbon gets flipped under
toward the center of the shoe rose and stitched down as far as possible
out while keeping the rose symmetrical as possible.
To create the middle
cap petal that hides the rest of the stiches and folding, I looped the
tail end of the ribbon over on itself again, stopping just short of the
previous layer of petals. To cover all the stitches, it helps to
sew a line farther out than all the previous stitches before flipping
the ribbon over. The very end of the ribbon gets flipped under
toward the center of the shoe rose and stitched down as far as possible
out while keeping the rose symmetrical as possible.
After the pair is done, a small loop may be sewn on the back of the shoe rose--preferably into the center petal--so that the shoe roses may be tied with laces on to a pair of shoes. This loop could also be sewn on before the center petal or even the cross is completed, but I wasn't that clever the first time around.